Welcome to The Pink Kitchen.....where life is fashionably delicious!!!

Tuesday, December 21, 2010

Getting to Know Quinoa

Since I've made the switch to "cleaner", healthier eating, there have been many ingredients I have stumbled upon that are totally new to me. Quinoa is one of them. Quinoa (pronounced "KEEN-wah"), is a fluffy, round grain that can be used in place of rice or eaten like oatmeal. It was once considered the "gold of the Incas" because the Incas of South America considered it sacred and used it as part of their rituals. This little grain has many health benefits and is also gluten free. When making it, use 2 parts liquid to 1 part quinoa (example: 2 cups of water for 1 cup of quinoa.) It can be prepared the same way as rice (I make it in my rice cooker) and you can substitute chicken broth for water. There are also some quinoa-based pastas on the market which are very delicious and much healthier than semolina pastas. 


Quinoa Primavera

Ingredients:
1 cup quinoa 
2 cups organic chicken broth 
1 tablespoon extra virgin olive oil 
1/2 cup finely chopped red onion 
1/2 pound (about 1/2 bunch) asparagus, woody ends snapped off and discarded, spears cut into 1-inch pieces 
2 cloves garlic, finely chopped 
1 cup fresh peas or frozen petite peas, thawed 
1 cup shredded cooked chicken  
Sea salt and freshly ground pepper to taste
Directions:
1. Rinse quinoa under cold running water and drain. Combine chicken broth and quinoa in a medium saucepan and bring to a boil. Reduce heat to a simmer, cover and cook until quinoa is tender and all the water is absorbed, 15 to 20 minutes. 
2. Meanwhile, heat olive oil in a large skillet over medium heat. Add onion and asparagus. Cook, stirring often, until asparagus is tender and bright green, 5 to 7 minutes. Add garlic and peas and continue cooking for another minute. Stir in chicken and cooked quinoa. Season with salt and pepper and serve immediately.

Alissa's notes: This recipe is really good! I was shocked at how delicious the quinoa was! I made mine in my rice cooker instead of on the stovetop. Also, instead of stirring the quinoa into the veggie/chicken mixture, I just served it on top (similar to stir-fry served on top of rice). Makes great leftovers! I have even made sweeter recipes with quinoa. Mix in dried cranberries, almond slices, drizzle with raspberry vinaigrette, then top it with parmesan cheese. YUM!


Hot Dates

I have recently discovered dates (as in the fruit) and I am obsessed! If you've never had a date, you've got to try them! They are sweet, like raisins, and have a yummy, chewy texture. I've even been eating them plain, that's how much I like them! There are several varieties of dates, but the Medjool is the most common and can be found in the produce section of most grocery stores. (Those are Medjool dates in my picture below.) So I went searching for some recipes that included dates. When I found one for chicken salad, I had to try it!


Chicken salad has always been one of my favorite foods! Normally I just cook chicken in the crock pot all day (or buy a rotisserie chicken) and mix the shredded chicken with mayonnaise and some salt and pepper. Occasionally, I will add some pecans, apples, or grapes. So, when I stumbled upon this recipe for Curry Chicken Salad, I was really curious to try it out (especially since it had dates in it)!


Curry Chicken Salad


Ingredients:


4 chicken breasts, baked and shredded (or shredded rotisserie chicken)
Mayonnaise (amount depends on desired consistency)
5 Medjool dates, diced
3/4 cup pistachios
1/2 teaspoon curry powder
salt and pepper to taste


Directions:


1. Shell pistachios. Slice open dates and remove pits before dicing. Combine all ingredients and add mayonnaise until salad reaches desired consistency.
2. Serve on a bed of lettuce, or in a sandwich or wrap.


Alissa's notes: I browned the chicken breasts in my Le Creuset casserole on the stovetop and then finished baking them, covered, in the oven. I seasoned the chicken with a little minced onion, salt and pepper.  If you don't want to try dates, raisins can be used instead (which I have done and it tastes good that way, too). If you are a big fan of chicken salad with grapes and nuts, you will LOVE this recipe! Also, if you don't like curry, you can omit that seasoning. I made Stovetop Simmered Maple Beans to go along with the chicken salad wraps. Send me a message or comment if you are interested in trying that recipe.

Monday, December 13, 2010

Granola Crunchy Person

Oh no! I'm turning into a "Granola Crunchy" person! Haha! That is what one of my friends calls those super-earthy, Patchouli-wearing, Whole Foods-shopping people! No offense to anyone who shops at natural foods stores or eats healthy, but I've always been known to love my sweets and loads of butter on everything! Until now! I recently read the book "Skinny Bitch", which if you haven't read, RUN, don't walk, to your nearest bookstore. This amazing book by Rory Freedman and Kim Barnouin will truly open your eyes to how disgusting the food is that we eat. It's laugh-out-loud funny and some parts are so disgusting that you may consider never eating meat again! Ever since I read it, I am trying to make healthier food choices, hence the granola recipe. I took a nice trip to Whole Foods and rounded up the supplies for my granola. I actually got this recipe off of the Whole Foods website, where there are thousands of really great recipes. (www.wholefoodsmarket.com) Not only is this recipe delicious, it will make your whole house smell amazing! Toasting coconut, buttery macadamia nuts, creamy vanilla, what's not to love? And don't worry, eating healthy is about as "crunchy" as I will ever get. I am definitely not the "earthy" type, considering I never leave my house without makeup, wouldn't be caught dead wearing Patchouli, and am addicted to shopping! 


Coconut Macadamia Granola

Ingredients:
4 cups old-fashioned rolled oats 
1/3 cup whole-wheat pastry flour 
1/2 cup unsweetened coconut, finely shredded 
Pinch of salt 
2/3 cup pure maple syrup 
6 tablespoons canola oil or high oleic sunflower oil 
1/2 teaspoon vanilla extract 
1/4 teaspoon natural coconut extract 
3/4 cup chopped macadamia nuts
Directions:
1. Preheat oven to 300°F and oil a large rimmed baking sheet. Combine oats, flour, coconut and salt together in a large bowl. 
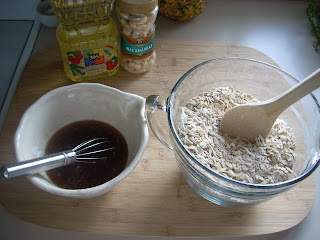
2. In a separate bowl, whisk together maple syrup, oil, vanilla and coconut extract to combine completely. Add to oat mixture, stirring well to coat. Transfer mixture to prepared baking sheet. Bake 30 minutes. 
3. Add macadamia nuts, turning and stirring the granola to mix them in. Continue to bake an additional 30 minutes.
4. Remove from oven and allow the granola to cool completely. Store in an airtight container in a cool dark place or in the refrigerator.


Alissa's notes: It's best if you stir the granola about every 10 minutes in the oven, so that it all toasts evenly. I omitted the coconut extract and added more vanilla extract instead. Also, I used regular shredded, sweetened coconut flakes from the baking aisle. Enjoy this granola with milk, on yogurt, or by itself. It's so yummy!

Sunday, December 12, 2010

Creamy Dreamy

As I was sitting in my house almost freezing to death, I decided to make some rice pudding to warm up. It is one of those "comfort foods" that I don't make very often, but absolutely love! I used Arborio rice, which is a rice named after the town of Arborio in the Po Valley of Italy, where it is grown. It is a short-grained rice, typically used to make risotto (which I'm not a big fan of). This rice has a higher starch content than white rice, which causes the pudding to have a creamier consistency. Yum! There are so many ways to make rice pudding. There are traditional recipes with cinnamon and raisins, and there are more unique recipes which include fruit such as peaches, oranges, or dried cranberries. This is one of my favorite recipes for a dairy-free rice pudding, but it can also be made with regular milk. I hope this recipe warms you up!


Creamy Rice Pudding

Ingredients:

3 cups cooked Arborio rice 
4 cups original Almond milk
1/2 cup Demerara cane sugar
1 tsp Madagascar vanilla bean paste (or 2 tsp vanilla extract)
pinch of grated orange peel
sprinkle of cinnamon and nutmeg (optional)

Directions:

1. Cook Arborio rice as directed on package to yield 3 cups. Place cooked rice in large saucepan. Add almond milk, vanilla, and sugar and cook over medium heat until the mixture starts to simmer (about 20 minutes). Allow mixture to simmer over low heat for 5 minutes.
2. Remove from heat and add grated orange peel, cinnamon, and nutmeg to taste. 
3. Serve warm or cold. Can be topped with orange segments if desired.


Alissa's notes: Most of the ingredients in this recipe can be substituted. You can use regular milk or regular sugar. I just wanted to make this version dairy free. If using regular milk, you may find it necessary to add a little more sugar. The pudding will not seem very thick at first, but thickens much more as it cools. 

Friday, November 26, 2010

My Favorite Fish Recipe

I am always saying that I need to include more fish in my diet. Every time I make it, I vow to make it more often, but never do. Now that I have found this delicious recipe, I will surely be making it more often. First of all, fish is one of the few food sources of omega-3 fatty acids (nuts are another good source) which we need in our diet since our body cannot produce them. These fatty acids are really beneficial for your heart, skin, fatigue, and even mood swings and depression. A lot of people don't eat fish because they can't get past that "fishy" taste. This recipe calls for tilapia, which is a very, mild white fish. It very rarely has a "fishy" taste, unless it's not fresh. Some other mild fish types that could be used in this recipe are cod, halibut, ahi-mahi, orange roughy, or flounder. Fish is also a great option for weeknight meals, since it cooks up in a flash. This recipe and photo were taken from The Steamy Kitchen website (www.steamykitchen.com).


Pecan Crusted Tilapia with Honey Glaze


Ingredients:

4 whole Tilapia fillets, cut in half lengthwise
3 T organic honey
1 cup Panko breadcrumbs
1/2 cup crushed pecans
salt & pepper
3 eggs, beaten
 
Honey Glaze: 3 T organic honey mixed with 2 T hot water
3 T olive oil, for frying

Directions:
1) Wash Tilapia and pat dry. Crack eggs onto a plate or breading tray. Combine breadcrumbs, salt, pepper, and crushed pecans in a separate breading tray or plate.
2) Using tongs or a fork, coat fish in egg and then press into breading mixture until coated.
3) Heat a large fry pan over medium heat. Add olive oil. When the oil is hot, turn the heat down to low. Add the fillets to the pan, make sure the fillets don’t touch each other. You may have to do this in separate batches. Fry on low for 2 minutes until the underside is golden brown. Turn. Fry another 2 minutes or until the fish is cooked through. While fish is cooking, whisk together honey and hot water to make the glaze. Pour the honey glaze over the fish. Note: if you don’t fry on low heat, the panko/pecan coating will burn before the fish is cooked through.

Alissa's notes: I used my Pampered Chef food chopper to chop the pecans very fine. If the pecan pieces are too large, they will fall off the fish while cooking. Also, breading trays make coating food so much easier. You can find them at Williams-Sonoma, and Pampered Chef makes them as well. This fish is great served with a salad (I did a caesar salad)!

Thursday, November 25, 2010

Ooh La La

If you haven't been to the new Sur La Table (pronounced Sir-la-tahb) store in the King of Prussia Court yet, you need to make a special trip! It is similar to Williams-Sonoma, but has lots of cute little gadgets and things that any cook would love! They also offer hands-on cooking/baking classes in their large kitchen/classroom in the back of the store. The last time I was in the store, I bought a really adorable cupcake set which included cupcake liners and decorative toothpicks. The kit was called "Ooh La La" and I was simply drawn to it because it was pink (shocking, I know). I wasn't sure when I would ever use it, but recently I made cupcakes for work and decorated them using this kit. I love how they turned out! The recipes for the cupcakes and icing were taken from "Martha Stewart's Cupcakes", a really cute book filled with over 175 cupcake ideas! I particularly loved the buttercream icing!


Devil's Food Cupcakes

Ingredients:

3/4 cup unsweetened, Dutch-process cocoa powder
3/4 cup hot water
3 cups all-purpose flour
1 tsp baking soda
1 tsp baking powder
1 1/2 cups (3 sticks) butter
2 1/4 cups sugar
4 large eggs, at room temperature
1 Tbsp, plus 1 tsp pure vanilla extract
1 cup sour cream, room temperature

Directions:

1. Preheat oven to 350 degrees. Line standard muffin tins with paper liners. Whisk together cocoa and hot water until smooth. In another bowl, whisk together flour, baking soda, and baking powder.

2. Melt butter with sugar in a saucepan over medium-low heat, stirring to combine. Remove from heat, and pour into a mixing bowl. With an electric mixer on medium speed, beat until mixture is cooled, 4 to 5 minutes. Add eggs, one at a time, beating until each is incorporated, scraping down sides of bowl as needed. Add vanilla, then cocoa mixture, and beat until combined. Reduce speed to low. Add flour mixture in two batches, alternating with the sour cream, and beating until just combined after each.

3. Divide batter evenly among lined cups, filling each three-quarters full. Bake, rotating tins halfway through, until a cake tester (or toothpick) comes out clean, about 20 minutes. Transfer tins to wire racks to cool 15 minutes; turn out cupcakes onto racks and let cool completely. Cupcakes can be stored overnight at room temperature, or frozen up to 2 months, in airtight containers.


Swiss Meringue Buttercream

Ingredients:

5 large egg whites
1 cup plus 2 Tbsp sugar
pinch of salt
1 pound (4 sticks) unsalted butter, cut into tablespoons, room temperature
1 1/2 tsp pure vanilla extract

Directions:

1. Combine egg whites, sugar, and salt in a heatproof bowl of a standing mixer set over a pan of simmering water. Whisk constantly by hand until mixture is warm to the touch and sugar is dissolved (the mixture should feel completely smooth when rubbed between your fingertips).

2. Attach the bowl to the mixer fitted with the whisk attachment. Starting on low and gradually increasing to medium-high speed, whisk until stiff (but not dry) peaks form. Continue mixing until the mixture is fluffy and glossy, and completely cool (test by touching the bottom of the bowl), about 10 minutes.

3. With mixer on medium-low speed, add the butter a few tablespoons at a time, mixing well after each addition. Once all butter has been added, whisk in vanilla. Switch to paddle attachment, and continue beating on low speed until all air bubbles are eliminated, about 2 minutes. Scrape down the sides of the bowl with a spatula, and continue beating until the frosting is completely smooth. Keep buttercream at room temperature if using the same day, or transfer to an airtight container and refrigerate up to 3 days or freeze up to 1 month. Before using, bring to room temperature and beat with paddle attachment on low speed until smooth again, about 5 minutes. (Food coloring may be added if desired.)


Alissa's notes: So I know these cupcakes are NOT AT ALL diet friendly, so sorry to all of my "dieting friends". They are loaded with butter, but I think I have a little bit of a butter obsession, kind of like Paula Deen! The cupcake recipe calls for Dutch-process cocoa powder. If you cannot find that, you need to add more cocoa powder (about 1 full cup instead of 3/4 cup) to get a rich, chocolatey taste. I didn't do this, and mine weren't quite as chocolatey as I would have liked them to be, but still yummy. Don't be intimidated by the icing recipe. It is actually very easy, as long as you have a stand mixer. If you aren't sure about the whole "stiff peaks" thing, this just simply means that when you lift the attachment away from the mixture, a little peak will form and it will stay there without flopping over. I added pink food coloring to my icing. I started off slowly, just adding one drop at a time and letting the mixer blend it in. Keep going until you reach your desired color. I started off using little decorator tubes to pipe the icing onto my cupcakes (as seen in the above photo), but then just switched over to a ziplock bag with a little whole cut in the corner to save time. I actually just purchased the Easy Accent Decorator from Pampered Chef and can't wait to get it! It will make icing cupcakes a breeze next time!


Saturday, November 6, 2010

My New Addition

I'd like for you to meet my newest little addition to the Pink Kitchen. The Cuisinart popcorn popper!


Like I said in my previous post, lots of fabulous pink things come out every October for Breast Cancer Awareness. I've been wanting this popcorn maker for a while, and when I saw it in pink, I had to have it! Plus, a portion of my purchase went towards breast cancer research! My FAVORITE food in the whole world is popcorn, but not just any popcorn. I love movie theater popcorn (as greasy as it could possibly get, and I'm sure the butter they use isn't even real butter)! I'm on a mission to recreate the deliciousness that is movie popcorn. But until then, here is a great recipe for Caramel Popcorn. It's great for a snack anytime, or to give as a gift.


Caramel Popcorn


Ingredients:

1 c. butter
2 c. brown sugar
1/2 c. corn syrup
1 tsp. salt
1/2 tsp. baking soda
1 tsp. vanilla
5 quarts popped popcorn (about 3 bags microwave popcorn, or 3/4 c. kernels)

Directions:

1. Preheat oven to 250 degrees.
2. Melt butter in saucepan and add brown sugar, corn syrup, and salt. Stir until it comes to a boil. Boil without stirring for 4 minutes.
3. Remove from heat and stir in baking soda and vanilla.
4. Pour caramel over popcorn and stir to coat.
5. Spread popcorn on cookie sheets and bake for 1 hour, stirring every 15 minutes.
6. Cool and break into pieces.


Alissa's notes: If you want to make this even more interesting you can add peanuts, pecans, almonds, or a little bit of cinnamon. For slightly chewier caramel corn, bake for 30 minutes instead of the full hour. This is great to give as a holiday gift in cute little cellophane bags or Christmas tins.

Thursday, November 4, 2010

Take a peek inside...

If you've ever wondered what makes the Pink Kitchen so "pink", well you are about to find out! It all started with my pink KitchenAid Artisan stand mixer my mom gave me as a wedding shower gift. I've always loved the color pink, and I didn't even care that I may never find other pink things for my kitchen. Ever since October has been recognized as Breast Cancer Awareness Month, I haven't had any difficulties finding pink objects for my kitchen (and other parts of my house for that matter). And for those of you who may be wondering what my husband thinks of all this pink stuff, he knew what he was getting into when he said "I do", plus he's so laid back that he doesn't care how I decorate! So, take a peek!

The piece that started it ALL!!!

The pink blender I use every morning for my Shakeology

Various pink colanders

Lots of pink bowls (the ones on the left are my favorite from Williams-Sonoma)

Canister full of dog treats for my Chester

 On my stovetop always!

Too many spatulas

Love my Santoku knives

Cutting boards (I like to use these ones for meat)

Random gadgets (ice cream scooper, can opener, peeler, garlic press)

Bundt pan (has cute little hearts for Valentine's day)

Cake stand (because everyone needs a cake stand, haha!) 

I love William-Sonoma kitchen towels!

This one's sideways, but it's my apron!

I hope you enjoyed your tour of my "pink kitchen"! And since no post is complete without a delicious recipe, here's another winner! This recipe seems to have a lot of ingredients, but it's really easy to make and you will be eating leftovers for days!

Crab Manicotti with Bechamel Sauce

Ingredients:

1 box Manicotti pasta
1 15oz. ricotta (whole milk or part skim)
2 cups shredded mozzarella cheese
1/2 cup grated parmesan cheese
1 Tbsp. fresh parsley, chopped (or 1 tsp dried parsley)
1 c. imitation crab legs, diced
1 6oz. can fancy lump crabmeat
1/4 tsp. salt
1/4 tsp. pepper
1 egg yolk

Bechamel sauce:

5 Tbsp. butter
1/2 c. flour
4 c. whole milk (or 2%)
1/2 tsp. salt
1/4 tsp. pepper
pinch of grated nutmeg

Directions:

1. Preheat oven to 350 degrees.
2. Mix together ricotta, 1 c. mozzarella, imitation crabmeat, salt, pepper, egg yolk and parsley. Fold in canned crab meat last, stirring gently so you don't break up the lumps of meat.
3. Cook manicotti until al dente (according to directions on box). Drain and lay in a single layer on a baking sheet to cool (this way they don't all stick together).
4. To make the bechamel sauce, melt butter in a saucepan. Add flour and whisk until combined. Add rest of ingredients and cook over medium, whisking occasionally, until thickened.
5. Spray a 9x13 inch baking dish with cooking spray. Stuff each manicotti with the crab/cheese mixture and place in a single layer in baking dish.
6. Pour bechamel sauce over the pasta. Sprinkle with 1 c. mozzarella and 1/2 c. grated parmesan.
7. Bake for 20 minutes until bubbly.


Alissa's notes: I've done this recipe both ways, with whole milk/whole milk ricotta and 2% milk/part skim ricotta. It tastes good either way, the first is just thicker and creamier. Be sure to squeeze all the excess moisture out of the canned crab meat (just like you would with tuna.) Stuffing manicotti can be tricky, but gets easier with practice. I like to use a spreader (a little one like you would use to serve cheese spread or dip) to stuff the filling into the tubes. You can also turn on the broiler for the last few minutes if you want the cheese to brown on top (since parmesan cheese tastes even better this way!) Just watch it carefully so it doesn't burn. Don't forget the nutmeg in the bechamel sauce. It's gives the sauce that "little something extra"! So yummy!


Sunday, October 24, 2010

REAL Meatballs

I only recently started liking meatballs. It's very easy to be grossed out by the frozen, processed ones they sell at the grocery store. So, I looked high and low for a good meatball recipe. I wanted them to be garlicky, moist, and perfect for a meatball sandwich. I found this recipe on Allrecipes.com which is one of my favorite recipe websites. I altered this recipe to make it my own, and I think these meatballs are the BEST ones on the planet (believe me, I am very picky when it comes to meatballs)! I cook them on my very, "seasoned" Pampered Chef stoneware pan. I love Pampered Chef stoneware and use it all the time for cooking and baking. For some reason, everything always turns out better on stoneware in my opinion. These meatballs cook up quickly and then you just add them to your favorite marinara sauce (please don't ruin them by putting them in Prego or Ragu!) You can either make a fresh marinara, which is easier than it sounds, or buy a really good jarred marinara sauce. I really like Barilla's Marinara sauce. Top your meatballs with provolone cheese for a meatball sammie, or with Parmesan over pasta. Either way, these meatballs are a HIT! 


Ingredients:

2 lb. ground beef
1tsp. salt
1 1/2 tsp. onion powder (or Tastefully Simple Onion Onion)
1 tsp. garlic powder
1 tsp. oregano
1/2 tsp. basil
1/2 tsp. crushed red pepper flakes
2-3 dashes hot sauce
3 Tbsp. Worcestershire sauce
2/3 cup milk
1/2 cup fresh, grated Parmesan cheese
1/2 c. plain bread crumbs
1/2 c. Panko bread crumbs

Directions:

1. Preheat oven to 400 degrees.
2. Mix all ingredients with hands or wooden spoon until thoroughly combined. Roll into balls.
3. Place on baking sheet (or stoneware) and bake for 25-30 minutes until centers are no longer pink.
4. Add to your favorite sauce and serve over pasta or on crusty, italian rolls.
5. Top with Provolone or Parmesan cheese.


Alissa's notes: If you have it (or can get your hands on some), I like to use Tastefully Simple's Onion Onion seasoning blend in place of onion powder. It makes a big difference since it has actual onion pieces in it. You may want to spray your baking sheet with cooking oil before putting the meatballs on. The stoneware has a natural nonstick surface so I didn't use any oil. I also popped the rolls under the broiler just for a few seconds to get the outsides nice and crusty. You can also put your provolone cheese inside of the rolls before you put them in the oven. I used a fresh marinara sauce without any seasonings added. The meatballs themselves have enough flavor to compensate for seasoning the sauce. This recipe makes 24 large meatballs.

Thursday, October 21, 2010

For the Love of Basil

Before writing this post, I did lots of research on the herb, basil. There is so much to learn about this plant, which is a member of the mint family. Did you know that basil actually has antibacterial qualities? The oil from basil leaves actually has the ability to inhibit growth of certain bacteria that are very resistant to antibiotic drugs (based on research studies). In addition, basil also acts as an anti-inflammatory, providing relief for those with certain types of arthritis and inflammatory bowel diseases. Who ever would have thought that this herb wasn't only delicious, but good for you too? It is also a good source of Vitamin K, A, iron, and calcium. So next time you eat a caprese salad or some pesto spread on crusty, Italian bread, know that you are eating something healthy, as well as tasty.
So, for the love of basil, I decided to try a new recipe: Chicken Fettuccine with Pesto Cream sauce. The pesto is not too overpowering in this dish. If you've never had pesto before, this is a good way to try it!


Chicken Fettuccine with Pesto Cream Sauce


Ingredients:

1 1/2 lb. skinless, boneless chicken tenders
Half pint heavy cream
1/2 c. (packed) fresh basil leaves, stems removed
2 cloves of garlic, peeled
2- 1 1/2 inch cubes fresh Parmesan cheese
1/2 lb. fettuccine
salt & pepper to taste
Extra virgin olive oil

Directions:

1. Heat a drizzle of olive oil in a saute pan. Tenderize chicken tenders on a cutting board. (If you don't have a tenderizer, use a fork.) Cut chicken into small strips. Add to hot pan and season with salt and pepper. Cook over medium heat until brown and cooked through.
2. Cook fettuccine noodles in salted water according to packaging.
3. In a food processor, pulse together basil, garlic, and Parmesan cheese until a chunky paste forms.
4. Add heavy cream to chicken and bring to a low simmer. Add pesto mixture and stir into sauce. Cook on low for a few minutes (sauce will thicken slightly.)
5. Drain pasta and add to chicken and sauce mixture. Toss all ingredients to combine.


Alissa's notes: If you don't feel like making your own pesto (which usually has pine nuts or some type of nut in it) you can buy it pre-made at the grocery store. I swear by my Deni 56-blade meat tenderizer. It makes every piece of meat I use it on really, really tender. If you have leftover basil, you can store it wrapped in damp paper towels in a plastic bag and it should last 4 days in the refrigerator. I took leftovers of this meal to work the next day for myself and a coworker (I didn't want to see her eat another peanut butter and jelly sandwich!) This is what I found at the end of the day:

Tuesday, October 19, 2010

Feisty Fajitas

I am known to get cravings for Mexican food! My husband and I frequently visit two very good Mexican restaurants in our area. There is something about all that warm, spicy flavor being washed down with a nice, refreshing margarita (on the rocks with salt is how I like mine). We went to Puerto Rico on our honeymoon where we enjoyed a fabulous Mexican meal right in the heart of old San Juan. It was a cute, quaint restaurant and the food was amazing! I had the best chicken nachos there (and a tasty raspberry margarita too!) Then about one year ago, I went to the Dominican Republic with my mom and got to experience even more Spanish-style food that I had never tried before. Chorizo, a spicy sausage, was my greatest finding and I have since used it in many recipes. I've also always been a fan of fajitas, but I usually get chicken or carnitas (pork). For something new, I wanted try a recipe for Shrimp fajitas. This is the one I recently made and they were delicious! "Una comida muy buena!" 


Shrimp Fajitas

Ingredients:

1 1/4 pounds raw shrimp
1 clove garlic, chopped
Drizzle of extra virgin olive oil 
Pinch of red (cayenne) pepper, or more if you like it spicy
1/4 tsp paprika
Salt and pepper to taste
1 red bell pepper, sliced in strips
1 green bell pepper, sliced in strips
1 small onion, chopped lengthwise
6 large flour tortillas
Sour cream
Shredded Cheddar-Jack cheese


Directions:

1. Drizzle olive oil in a hot saute pan. Cook garlic in oil for 1 minute. Add raw shrimp (tails and shells removed.) Season with cayenne, paprika, salt, and pepper. Once shrimp is pink, remove from pan.
2. Drizzle more olive oil in pan and add chopped onion and peppers. Season with salt and pepper. Cook over medium heat until veggies are tender (onions will begin to brown).
3. Add shrimp back to the pan and continue to cook all ingredients for a few minutes for flavors to combine.
4. Spoon fajita mixture into flour tortillas and top with shredded cheese and sour cream.


Alissa's notes: All you need to complete this simple meal is a margarita!!! Makes great leftovers, too! You could also top these fajitas with some salsa or guacamole.

Sunday, October 10, 2010

Fall = Comfort Food

I absolutely love this time of year. I get a yearning for comfort food and baked goods that contain apple or pumpkin. Most of you who know me know that as the weather gets cooler, I get happier. I've never been able to figure out why I love cold weather. Maybe because I was born in January? When I think about comfort food, here are some recipes that come to mind: rice pudding, roasted chicken, chocolate chip cookies, pumpkin bread, and CHICKEN POT PIE! I love chicken pot pie and this is the best recipe I have found for it. It's actually very easy (and very comforting)!


Chicken Pot Pie (adapted from Best Loved Casseroles)

Ingredients:
1 (14.5oz) can chicken broth
1/2 tsp salt
1/4 tsp pepper
1- 1 1/2 c. milk
3 Tbsp butter
1 small onion, chopped
1/3 c. flour
2 c. diced, cooked chicken
2 c. frozen mixed vegetables (broccoli, carrots, cauliflower)
Small dash of dried thyme
1 Tbsp chopped parsley
1 store bought, refrigerated pie crust
1 egg, beaten

Directions:
1. Preheat oven to 400 degrees.
2. Pour chicken broth, salt, and pepper into a large measuring cup. Add enough milk to equal 2 1/2 cups.
3. Melt butter in large saute pan over medium heat. Add onion. Cook 3 min. Stir in flour until well         blended.
4. Gradually stir in broth mixture. Stir until thickened.
5. Add chopped chicken, veggies, thyme, and parsley. Pour mixture into a casserole dish.
5. Place pie crust over the casserole dish (you may need to roll the crust out a little bit to fit over your dish. I usually use a 9x9 inch baking dish). Press the crust edges against the edge of the dish.
6. Brush crust with beaten egg. Bake for 30 minutes until crust is golden brown.


Alissa's notes: You can use whatever veggies you like in this pot pie. I added 1/2 c. corn and it was yummy. I usually defrost the frozen veggies in the microwave a little bit and chop them up smaller before adding them in. If you like celery, you can add 1/2 c. chopped celery in with the onion. This dish turns out better for me when I use a store-bought rotisserie chicken rather than cooking chicken breast myself. The flavor of the rotisserie chicken really compliments this dish.


RATING: 5 cupcakes

Sunday, September 12, 2010

Sexy Lil' Kitchen

I've always been intrigued by the idea that food can be an aphrodisiac. Years and years ago, when Sharon Osbourne still had her own talk show, she had on a guest/author named Jacqui Malouf. They were discussing a cookbook called "Booty Food" which I went and purchased a few days later (and has been one of my favorite cookbooks ever since). The book describes booty food as "any food that causes weak knees, accelerated heartbeat, tingly body parts, and other symptoms traditionally associated with falling in love". Did I get your attention yet? Here are just a few foods that this book classifies as having aphrodisiacal qualities:


-Cheese
-Garlic
-Walnuts
-Artichokes
-Figs
-Mushrooms
-Onions
-Strawberries
-Oysters
-Shrimp
-Chocolate
-Honey
-Champagne
-Coffee
-Ruby Port


I recently made this recipe for Pork Tenderloin with Port-Infused Fig Sauce. I know, it sounds really complicated, but it's so simple and so delicious! The book suggests to prepare this meal "anytime your relationship needs a little pick-me-up".  I actually wanted to make this dish a few months ago, but had a difficult time finding fresh figs.  Fresh figs are in season right now and can be found at most grocery stores in the produce section.  Ruby port, which is also used in this recipe, can be found at any liquor store. As for the consequences of consuming this meal with your significant other, I will not be held personally responsible for whatever may happen later that evening. All I'm going to say is, well....... you can thank me later!


Pork Tenderloin with Port-Infused Fig Sauce


Ingredients:


-20 ounce pork tenderloin
-drizzle of olive oil
-2 cups ruby port
-8 ounces ripe black figs
-salt and pepper to taste


Directions:


1. Preheat oven to 375 degrees. Rub pork tenderloin with olive oil, salt, and pepper. Place on a baking sheet and cook until internal temperature reaches 160 degrees. You can also cook the pork on the grill over medium heat.


2. While pork is cooking, pour ruby port into a saucepan and cook over high heat until it reduces by half.


3. Peel and mash the figs, saving two for garnish. (The skin can be removed easily by cutting the fig in half and then simply squeezing the outside.) Add the mashed figs to the port syrup, and simmer on low heat for 10 minutes.


4. When pork is finished, let rest for about 10 minutes, then slice into medallions. Serve with fig sauce and garnish with fig halves if desired.


Alissa's notes: In case you're not sure how long to cook the pork, most pork tenderloin packages give you guidelines for how long to cook it per pound. I like to use a meat thermometer to check for doneness, because if you slice into it, all the juices run out.