Welcome to The Pink Kitchen.....where life is fashionably delicious!!!

Friday, March 18, 2011

Some of my Favorite Things

This is like Oprah's favorite things, "Pink Kitchen" style. Everyone has certain items in their kitchen that are their favorites or that they constantly reach for. Here are mine:


1. KitchenAid Artisan Stand Mixer. Of course my pink KitchenAid mixer is at the top of my list since it's what started this crazy "pink" obsession in the first place. This mixer is my favorite for making cookies or mashed potatoes. ($299.99, Macys.com)

2. Le Creuset 5 1/2 quart French oven and 3 1/2 quart Braiser. I cannot tell you how much I love these. I use them constantly.  The French oven is great for roasting a whole chicken or for soups and chili. The casserole pot can be used the same way as a saute pan. I am always cooking chicken breast or ground beef in that one. These can be purchased at Williams-Sonoma (www.williams-sonoma.com) or the Le Creuset outlet in The Philadelphia Premium outlets in Limerick.  Also, I purchased the stainless steel knob on the yellow one at the outlets. The regular black knobs can only withstand a certain temperature in the oven. I think the yellow color (Citron at Williams-Sonoma) is discontinued, but the Dune shade is still available. (French oven, $240. Braiser, $205. Williams-sonoma.com)

3. Pampered Chef Bamboo Knife Block set. These are the best knives I've ever used! Plus, this set comes with all the knives (except for the pink one in the picture), kitchen shears, and a sharpening tool. ($415, www.pamperedchef.com)

4. Deni 56-Blade Meat Tenderizer. If your chicken always turns out tough (like mine used to) this is a lifesaver! This makes chicken and steaks so tender you could cut them with a butter knife! I purchased mine from QVC, but I think it's currently out of stock. They are also available on Amazon. ($26 amazon.com)
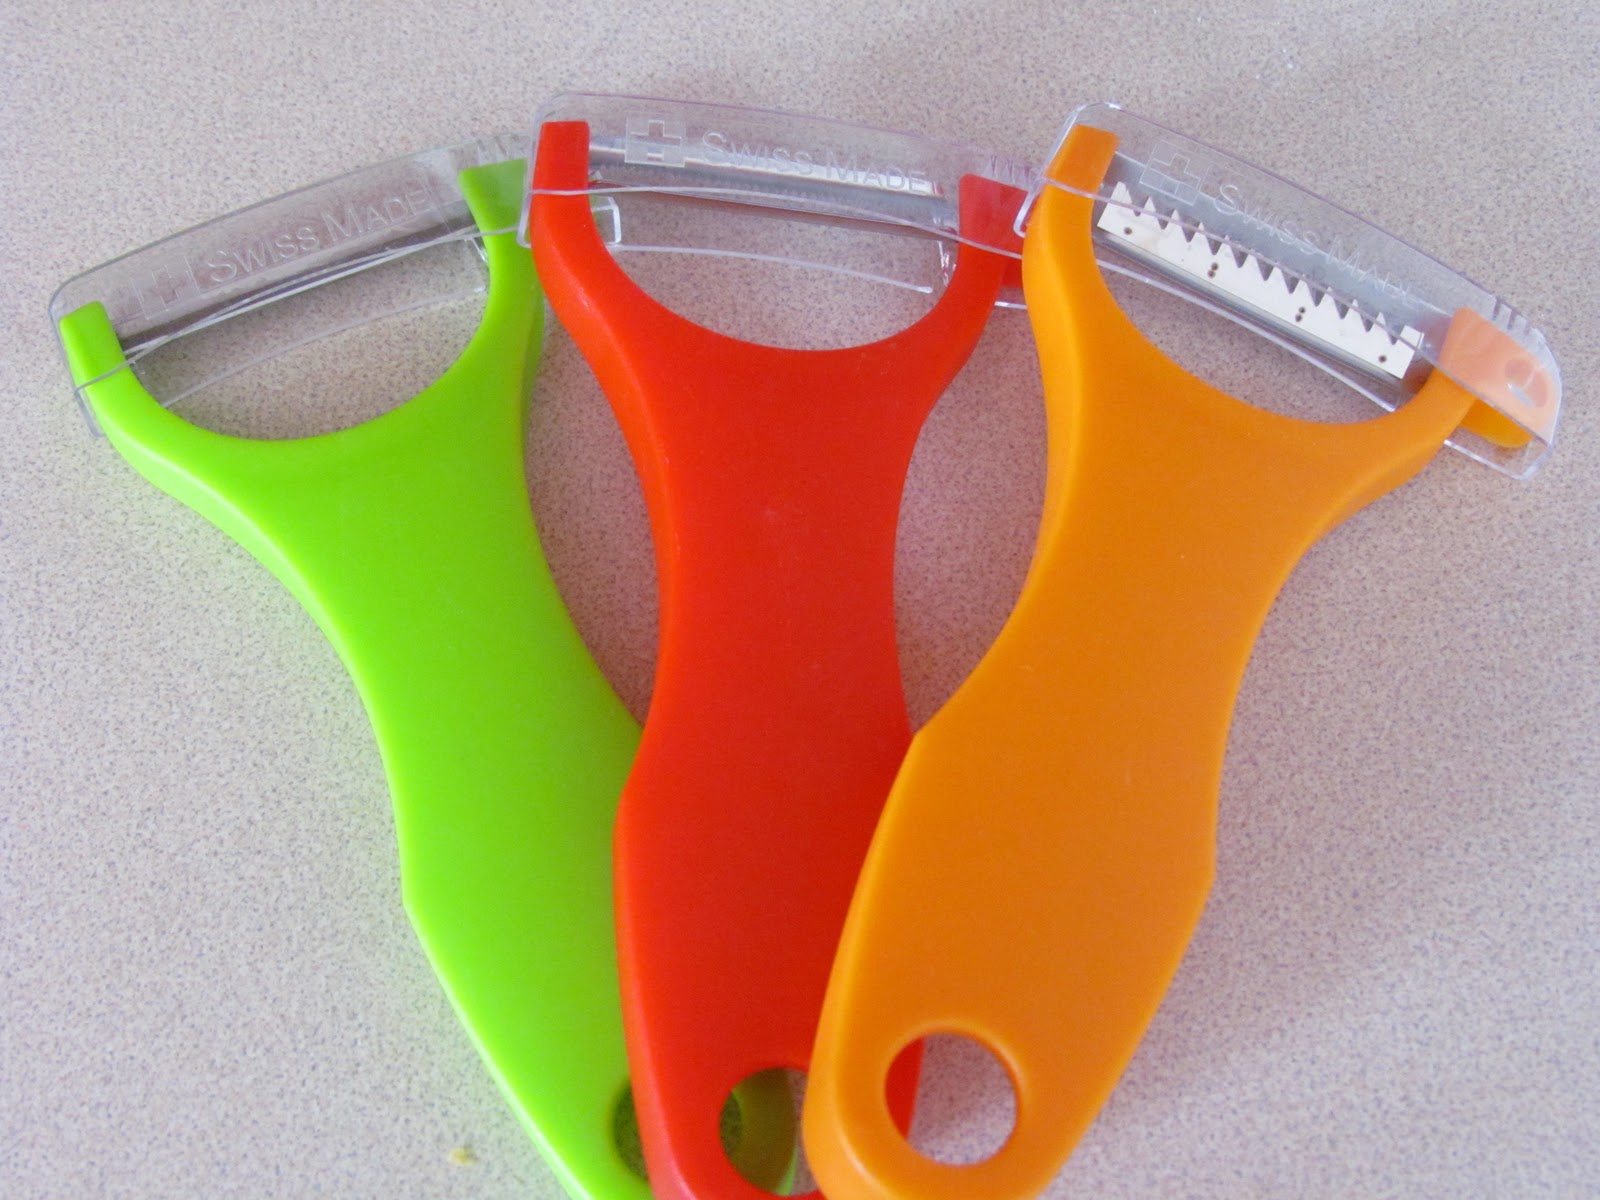
5. Swissmar Peelers, set of 3. These peelers don't look like anything special, but they are! Includes a straight edge peeler, serrated edge peeler, and a julienne peeler. The straight edge is great for potatoes and carrots. The serrated edge can be used on softer items like peaches or tomatoes. I can't wait to use the julienne peeler this summer to make "pasta" out of zucchini, since this one slices into thin strips. Only $15 for the whole set! What a steal! ($15, williams-sonoma.com)

6. Nielsen-Massey Vanilla Bean Paste. This stuff rocks! It has little vanilla bean flecks in it so it makes homemade vanilla ice cream look gourmet. A little goes a long way. One bottle usually lasts me about 1 year. Has more flavor than vanilla extract so you don't need to use as much. I swear it makes chocolate chip cookies taste better! ($11, Williams-sonoma.com)

7. Tastefully Simple Onion Onion and Garlic Garlic seasoning blend. I love fresh garlic and onion, but sometimes I'm a little lazy and don't feel like chopping onions and messing with stinky garlic. These seasoning blends make your dish taste like you used the real thing. I use these all the time. The Onion Onion is great in meatballs! ($8.99 each, Tastefullysimple.com)

8. Stove-side must haves: Pepper mill, Salt Pig, and Olive oil. I like to have these right beside my stove so I can just grab them while I'm cooking. The pepper mill and salt pig are from HomeGoods. The olive oil dispenser is from Reading China and Glass.

9. Pampered Chef Garlic Press. The BEST garlic press on the market. You don't even have to peel the garlic clove. Just throw the whole thing in and squeeze! The little tool that comes with it is for cleaning and it attaches directly to the inside of the handle so it doesn't get lost. ($16.50 Pamperedchef.com)

10. All-Clad Measuring Cups and Measuring Spoons. First of all, I love All-Clad. They make the best products and almost all of their items have a lifetime warranty. These are not only cute (they resemble the full-size stainless steel All-Clad pots), but super durable too. ($50 if you buy them as a set, williams-sonoma.com)

11. Pampered Chef Stoneware. I'm sure everyone gets sick of hearing how much I love this stuff, but it really is amazing! In the picture above, I included a brand new stone, so you can see how much I've used the yucky brown one. Even though it looks gross, this is how you want it to look. The uglier it gets, the better it performs! It creates its own non-stick surface.
(Medium bar pan, $24. Pamperedchef.com)

12. Metrokane Rabbit Wine Tool Kit. If you love wine, you need a rabbit. Opens wine like nobody's business! Simply love it! I love to have a glass of wine while I'm cooking dinner. Turn on a little Michael Buble....heaven! ($49.99, Bedbathandbeyond.com)

Thanks for checking out my favorite things! Speaking of wine, I think I might have a glass!


***Anyone interested in Pampered Chef products, please contact my mom, Sue Greer via email at sgreer48@comcast.net. She'd be happy to discuss the products with you or set a date to host your own Pampered Chef party and earn free products! You can also order directly from her website: http://www.pamperedchef.biz/suegreer


Thursday, March 17, 2011

Happy St. Patrick's Day!

In honor of St. Patrick's Day, I have to share my recipe for Irish Potato Candy. These adorable, little treats are so addicting! I received this recipe from a very Irish classmate in elementary school and have been making them ever since. I made a double batch this year and gave a bunch away, otherwise I'd eat them all myself! They resemble little potatoes although they do not contain any potato at all. Enjoy and Happy St. Patrick's Day everyone!


Irish Potato Candy

Ingredients:

2 cups coconut flakes
3 1/2 cups confectioner's sugar
1 tsp vanilla extract or vanilla bean paste
1/2 (8 oz) package cream cheese, softened
1/2 stick butter, softened
1 Tbsp. ground cinnamon


Directions:

1. Cream together butter and cream cheese with a mixer until smooth.


2. Beat in vanilla extract. Add in confectioner's sugar in small batches until incorporated. Mix or stir in coconut flakes.


3. Refrigerate coconut mixture for about 2-3 hrs or until firm. Roll into balls/potato shapes and refrigerate for an additional 1-2 hours.


4. Place 1 Tbsp cinnamon in a large ziploc bag. Place all "potatoes" into the bag and gently shake/tip bag  until all potatoes are coated with cinnamon. Add more cinnamon if desired.

Adorable little "Irish Potatoes"

Thursday, March 10, 2011

OMG

Is there anything better than the combination of chocolate and peanut butter? How about if you put it on top of a rice crispy treat? In the words of my friend Lisa (pictured below), "these bars are like heaven", followed by her saying "oh my God, oh my God" repeatedly! When I saw these bars on one of my favorite baking blogs (www.browneyedbaker.com) I thought they looked delicious, but not until I tasted them did I know how absolutely fabulous they really are! This recipe is a MUST TRY!


Peanut Butter Cup Rice Crispy Treats

Ingredients:

6 cups Rice Krispies
1 bag (10.5-oz) miniature marshmallows
¼ cup (2 ounces) butter
2 cups creamy peanut butter
1 bag (12-oz) miniature peanut butter cups (about 40), quartered
1 cup milk chocolate chips (or 6 ounces milk chocolate, finely chopped)
Directions:
1. Butter a 9×13-inch pan and set aside.
2. Measure the cereal into a large mixing bowl and set aside. Melt the marshmallows and butter together in a medium saucepan over medium heat (or in the microwave for about 3 minutes, but keep watch so the marshmallows don’t puff over the sides of the bowl!). Pour the melted marshmallow mixture over the cereal and mix well so the cereal is coated. Pour into the prepared pan and use a buttered spatula to press evenly into pan.
3. In the microwave, melt the peanut butter until thin, about 1 minute. Gently stir in the quartered peanut butter cups and then pour over the treats. Using the back of a spoon, gently spread the peanut butter mixture evenly across the top.
4. Again in the microwave, melt the chocolate chips. Using a spoon, drizzle the melted chocolate across the top. Place the pan in the refrigerator to set before cutting and serving. Store in an airtight container.
                                               Lisa enjoying her "heavenly" treat!

Wednesday, March 2, 2011

Feeling Spicy

I know spicy food isn't for everyone, but I love it! My two favorite Mexican restaurants in the area are Fiesta Ole in Emmaus, and Los Aztecas in Pottstown. Fiesta Ole has amazing margaritas and Los Aztecas is B.Y.O.B. But if you can't make it out, here's a great recipe for your next "Mexican night" at home!


Tex-Mex Chicken and Rice Skillet


Ingredients:


2 tsp olive oil, divided


1 cup frozen corn (thawed)


2 cups cooked rice or quinoa


2 tsp-1 tbsp homemade mexican seasoning mix, depending on how spicy/flavorful you want it to be (see recipe below)


16 oz container chunky salsa


1/3 cup water


3 boneless chicken breasts


1 cup shredded mexican cheese blend


Sour cream


Directions:


1. Add 1 tsp of olive oil to skillet and heat over medium-high until shimmering. Add corn to skillet in a single layer. Cook without stirring for 5 minutes or until caramelized on one side. Remove corn from skillet. Set aside.
2. As corn cooks, pound out chicken with a meat tenderizer and then cut into 1 inch pieces. Combine chicken pieces and mexican seasoning in a bowl until coated. Add 1 tsp olive oil to skillet and cook chicken over medium-high heat until center is no longer pink.
3. Add entire jar of salsa and 1/3 cup water to the skillet. Stir until mixture is heated through. Add corn and cooked rice. Top with shredded mexican cheese blend and allow to melt.
4. Top with a dollop of sour cream just before serving.


Homemade Mexican Seasoning Mix (aka Taco seasoning mix)


Simply mix together:


4 tablespoons chili powder 
2 tablespoons onion powder 
2 tablespoons garlic powder 
1 tablespoon natural brown sugar 
2 tablespoons ground cumin 
4 teaspoons sea salt, or to taste 
4 teaspoons paprika 
4 teaspoons dried oregano 
1 to 3 teaspoons crushed red pepper flakes, to taste
This makes 3/4 cup of seasoning mix that can be stored in an airtight container until ready to use! I got this recipe from the Whole Foods website and haven't bought taco seasoning from the store ever since! Most taco seasonings are packed with MSG, so this is a safe and healthy alternative. 

Alissa's notes: When you cook the rice/quinoa for this recipe, I recommend using chicken broth instead of water. This gives the rice more flavor and it blends nicely with the rest of the flavors in this dish. I decided to serve the chicken over the rice instead of stirring the rice in. Either way, this is so delicious!

Tuesday, February 15, 2011

I "Heart" Shrimp

Shrimp. It's so delicious! But not all shrimp are created equal. I love this recipe (Chris does too), but it's really important to use fresh, raw shrimp. I made this same recipe for Chris' buddies in California (yes, I even cook on vacation), but I used frozen, raw shrimp. Even though the shrimp still needed to be cooked, it turned out to be kind of "rubbery" in the end. We didn't have a choice though, since they live in a very small town and that's all that was available! This recipe is surprisingly easy, but tastes like you spent hours preparing it. Shrimp lovers, you have to try this!


Shrimp Scampi


Ingredients:


3/4 package of angel hair pasta
1/2 cup butter (1 stick)
2 or 3 garlic cloves, minced
1 lb. large shrimp, peeled and deveined
1/2 c. semi-dry white wine
2 Tbsp. dry unseasoned bread crumbs
Grated Parmesan cheese (optional)
Parsley for garnish (optional)


Directions:


1. In a large saute pan, melt butter over medium heat and saute garlic until tender. Add shrimp and cook until pink. Stir in white wine. Stir in bread crumbs (starting with 1 tablespoon) until desired thickness is reached. 
2. Cook angel hair pasta in boiling, salted water until al dente.
3. Drain pasta and add to shrimp/sauce mixture. Toss ingredients. Top with Parmesan cheese if desired and garnish with parsley.


Alissa's notes: Garlic gets bitter when it's overcooked, so add the shrimp just as the garlic starts to get tender. You don't want the garlic to brown. I used White Truck California White Wine. If you need tips on peeling and deveining shrimp, here's a good video (copy and paste into web browser):


http://www.youtube.com/watch?v=IOTMQ2oXdLE

Easy Weeknight Meal

I've been eating less red meat lately, but had a whole bunch of italian sausage in my freezer. I wanted to make a quick, easy meal that would help me use up some sausage. This recipe is really nothing fancy that will blow anyone away, but it's yummy and it's easy. This one is perfect for when you're short on time and/or ingredients, too! Our friend, Dan, was in The Pink Kitchen for dinner and he seemed to enjoy this recipe! I can't wait to hear what his friends think of him being featured on The Pink Kitchen blog!!! :)


Lasagna Toss


Ingredients:


1 lb. uncooked rotini pasta

  • 1 lb. ground italian sausage

  • 1 (26 ounce) jar Marinara sauce (or your favorite sauce)

  • 1 cup cottage cheese

  • 2 cups shredded mozzarella cheese, divided


Directions:

1. Preheat an oven to 350 degrees F (175 degrees C). Grease a large casserole dish.

2. Bring a large pot of lightly salted water to a boil. Place pasta in the pot, cook as directed and drain.

3. Cook and stir the Italian sausage in a large skillet over medium heat until browned, about 8 to 10 minutes. Drain the fat from the meat, pour the cooked pasta and spaghetti sauce into the skillet, and stir well to combine. Bring the mixture to a boil.

4. Pour half of the hot pasta-sausage mixture into the prepared baking dish, spread with the cottage cheese in an even layer, and sprinkle with half the mozzarella cheese. Spread the remaining pasta mixture over the cheese, and top with the remaining mozzarella cheese.

5. Cover and bake in the preheated oven for about 25 minutes, until the casserole is hot and the cheese is melted and bubbling. Let it stand 5 minutes to firm up before serving.


Alissa's notes: I used a "coil" of italian sausage for this recipe, so I just squeezed it out of the casing. Also, if you don't like cottage cheese, you can substitute ricotta or just omit this step all together. I only used mozzarella cheese this time.


Saturday, January 15, 2011

Flavor-Packed Chicken

Isn't everyone always looking for a new chicken recipe? I'm always on the lookout for easy, weeknight meals. This recipe is really easy, super flavorful, and looks amazing, too! I've been finding some really delicious, healthy recipes on the Whole Foods website (www.wholefoodsmarket.com). You can search by category (for example: dairy free, gluten free, vegetarian, etc.) They also have a recipe newsletter you can subscribe to, and if you create an account, you can create your own recipe box. I'm loving this website! It's where I've been going when I need some "recipe inspiration"! 


Peruvian-Style Roasted Chicken

Ingredients:

1 1/2 teaspoons canola oil, plus more for oiling the pan 
1 tablespoon sweet paprika 
1 1/2 teaspoons fine sea salt 
1 1/4 teaspoons ground black pepper 
5 cloves garlic, minced
2 1/2 tablespoons white wine vinegar 
1 large sweet onion, peeled and thickly sliced 
1 chicken, cut into 8-10 serving pieces
2 red or yellow bell peppers, cored, seeded and cut into chunks 
1 lemon, sliced


Directions:

Preheat oven to 425°F. Oil a large roasting pan and set aside. In a small bowl, combine paprika, salt, pepper, garlic, vinegar and oil to make a paste. Place onions in a large bowl and toss with 2 tablespoons of the paste. Rub chicken pieces with remaining paste and place in prepared pan, then cover with onions, peppers and lemon. Roast, basting occasionally with pan juices, until chicken is cooked through and vegetables are very tender, about 45-60 minutes. Remove from oven and let rest 5 minutes before serving. 


Alissa's notes: As usual, I used my Pampered Chef stoneware pan. I use it any time I'm baking chicken. I flipped the chicken pieces twice during baking to help them brown evenly. The paprika, white wine vinegar, and garlic give the chicken so much flavor in this dish! It's amazing!