Welcome to The Pink Kitchen.....where life is fashionably delicious!!!

Saturday, January 15, 2011

Flavor-Packed Chicken

Isn't everyone always looking for a new chicken recipe? I'm always on the lookout for easy, weeknight meals. This recipe is really easy, super flavorful, and looks amazing, too! I've been finding some really delicious, healthy recipes on the Whole Foods website (www.wholefoodsmarket.com). You can search by category (for example: dairy free, gluten free, vegetarian, etc.) They also have a recipe newsletter you can subscribe to, and if you create an account, you can create your own recipe box. I'm loving this website! It's where I've been going when I need some "recipe inspiration"! 


Peruvian-Style Roasted Chicken

Ingredients:

1 1/2 teaspoons canola oil, plus more for oiling the pan 
1 tablespoon sweet paprika 
1 1/2 teaspoons fine sea salt 
1 1/4 teaspoons ground black pepper 
5 cloves garlic, minced
2 1/2 tablespoons white wine vinegar 
1 large sweet onion, peeled and thickly sliced 
1 chicken, cut into 8-10 serving pieces
2 red or yellow bell peppers, cored, seeded and cut into chunks 
1 lemon, sliced


Directions:

Preheat oven to 425°F. Oil a large roasting pan and set aside. In a small bowl, combine paprika, salt, pepper, garlic, vinegar and oil to make a paste. Place onions in a large bowl and toss with 2 tablespoons of the paste. Rub chicken pieces with remaining paste and place in prepared pan, then cover with onions, peppers and lemon. Roast, basting occasionally with pan juices, until chicken is cooked through and vegetables are very tender, about 45-60 minutes. Remove from oven and let rest 5 minutes before serving. 


Alissa's notes: As usual, I used my Pampered Chef stoneware pan. I use it any time I'm baking chicken. I flipped the chicken pieces twice during baking to help them brown evenly. The paprika, white wine vinegar, and garlic give the chicken so much flavor in this dish! It's amazing! 


Friday, January 7, 2011

Snowy Soup Day

The ground outside is covered in a sparkly layer of fluffy white stuff so I think it's a perfect day for a warm soup recipe. French onion soup is delicious and surprisingly easy to make! The most important step is to caramelize the onions. Caramelization occurs when the onions are cooked slowly, causing the sugars to be released. When done properly, the onions will become very soft and turn a golden brown color. After all, you don't want crunchy onions in your soup!


Classic French Onion Soup

Ingredients:
1 large red onion, sliced in thin strips
1 (32oz.) organic beef broth
3 cloves garlic, minced
2 Tbsp. olive oil
1/2 c. dry white wine
1/8 c. low sodium soy sauce
2 Tbsp. Worcestershire sauce
Dash of thyme
Dash of red pepper flakes
Dash of black pepper

6-8 slices of Provolone cheese 
Croutons (butter and garlic flavored)

Directions:
1. Heat 2 Tbsp. olive oil in a stock pot. Add sliced onion and stir to coat onions with oil. Cook over medium/low heat until onions become caramelized (about 30 minutes). Placing a lid on the stock pot can help speed up this process. 
2. Once onions are caramelized, add garlic. Pour 1/2 c. white wine into the pot to deglaze the pan. This will help get all the little bits off the bottom of the pot. Add the remaining soup ingredients (everything except for the cheese and croutons) and continue to cook, covered, for at least 30 minutes. 
3. Once soup is finished, ladle into crocks and sprinkle with a handful of croutons. Top with 3-4 slices of Provolone cheese. Place crocks under broiler for a few minutes until cheese begins to bubble and brown (watch closely so you don't burn the cheese). Enjoy!


Alissa's notes: This recipe makes enough for two big crocks full of soup. I think next time I will double the recipe so I have leftovers. Place your oven rack in the middle/low position when broiling so you don't scorch the cheese! I bought my crocks at Reading China and Glass in Reading, PA. If you don't have crocks, just use oven-safe bowls or soup bowls. The Le Creuset stock pot works great for caramelizing onions. Since it heats very evenly, you don't have to worry about burning your onions. 


Tuesday, December 21, 2010

Getting to Know Quinoa

Since I've made the switch to "cleaner", healthier eating, there have been many ingredients I have stumbled upon that are totally new to me. Quinoa is one of them. Quinoa (pronounced "KEEN-wah"), is a fluffy, round grain that can be used in place of rice or eaten like oatmeal. It was once considered the "gold of the Incas" because the Incas of South America considered it sacred and used it as part of their rituals. This little grain has many health benefits and is also gluten free. When making it, use 2 parts liquid to 1 part quinoa (example: 2 cups of water for 1 cup of quinoa.) It can be prepared the same way as rice (I make it in my rice cooker) and you can substitute chicken broth for water. There are also some quinoa-based pastas on the market which are very delicious and much healthier than semolina pastas. 


Quinoa Primavera

Ingredients:
1 cup quinoa 
2 cups organic chicken broth 
1 tablespoon extra virgin olive oil 
1/2 cup finely chopped red onion 
1/2 pound (about 1/2 bunch) asparagus, woody ends snapped off and discarded, spears cut into 1-inch pieces 
2 cloves garlic, finely chopped 
1 cup fresh peas or frozen petite peas, thawed 
1 cup shredded cooked chicken  
Sea salt and freshly ground pepper to taste
Directions:
1. Rinse quinoa under cold running water and drain. Combine chicken broth and quinoa in a medium saucepan and bring to a boil. Reduce heat to a simmer, cover and cook until quinoa is tender and all the water is absorbed, 15 to 20 minutes. 
2. Meanwhile, heat olive oil in a large skillet over medium heat. Add onion and asparagus. Cook, stirring often, until asparagus is tender and bright green, 5 to 7 minutes. Add garlic and peas and continue cooking for another minute. Stir in chicken and cooked quinoa. Season with salt and pepper and serve immediately.

Alissa's notes: This recipe is really good! I was shocked at how delicious the quinoa was! I made mine in my rice cooker instead of on the stovetop. Also, instead of stirring the quinoa into the veggie/chicken mixture, I just served it on top (similar to stir-fry served on top of rice). Makes great leftovers! I have even made sweeter recipes with quinoa. Mix in dried cranberries, almond slices, drizzle with raspberry vinaigrette, then top it with parmesan cheese. YUM!


Hot Dates

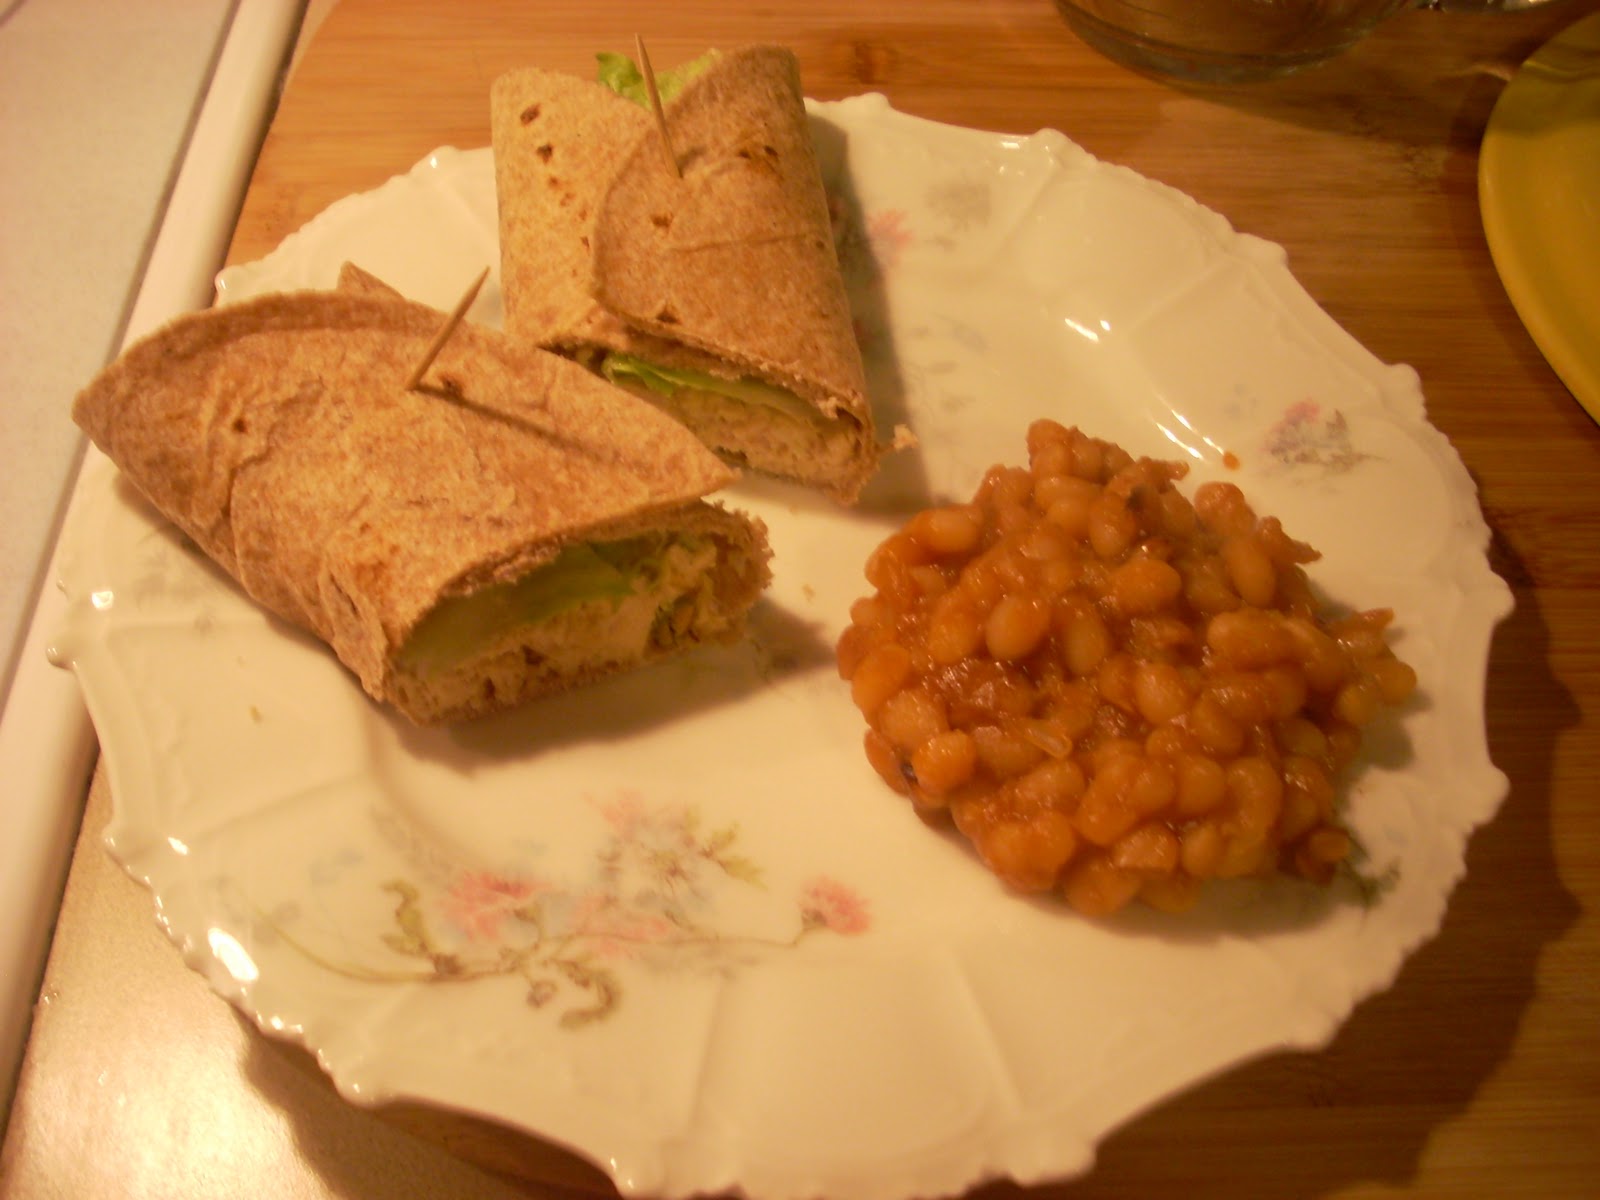
I have recently discovered dates (as in the fruit) and I am obsessed! If you've never had a date, you've got to try them! They are sweet, like raisins, and have a yummy, chewy texture. I've even been eating them plain, that's how much I like them! There are several varieties of dates, but the Medjool is the most common and can be found in the produce section of most grocery stores. (Those are Medjool dates in my picture below.) So I went searching for some recipes that included dates. When I found one for chicken salad, I had to try it!


Chicken salad has always been one of my favorite foods! Normally I just cook chicken in the crock pot all day (or buy a rotisserie chicken) and mix the shredded chicken with mayonnaise and some salt and pepper. Occasionally, I will add some pecans, apples, or grapes. So, when I stumbled upon this recipe for Curry Chicken Salad, I was really curious to try it out (especially since it had dates in it)!


Curry Chicken Salad


Ingredients:


4 chicken breasts, baked and shredded (or shredded rotisserie chicken)
Mayonnaise (amount depends on desired consistency)
5 Medjool dates, diced
3/4 cup pistachios
1/2 teaspoon curry powder
salt and pepper to taste


Directions:


1. Shell pistachios. Slice open dates and remove pits before dicing. Combine all ingredients and add mayonnaise until salad reaches desired consistency.
2. Serve on a bed of lettuce, or in a sandwich or wrap.


Alissa's notes: I browned the chicken breasts in my Le Creuset casserole on the stovetop and then finished baking them, covered, in the oven. I seasoned the chicken with a little minced onion, salt and pepper.  If you don't want to try dates, raisins can be used instead (which I have done and it tastes good that way, too). If you are a big fan of chicken salad with grapes and nuts, you will LOVE this recipe! Also, if you don't like curry, you can omit that seasoning. I made Stovetop Simmered Maple Beans to go along with the chicken salad wraps. Send me a message or comment if you are interested in trying that recipe.

Monday, December 13, 2010

Granola Crunchy Person

Oh no! I'm turning into a "Granola Crunchy" person! Haha! That is what one of my friends calls those super-earthy, Patchouli-wearing, Whole Foods-shopping people! No offense to anyone who shops at natural foods stores or eats healthy, but I've always been known to love my sweets and loads of butter on everything! Until now! I recently read the book "Skinny Bitch", which if you haven't read, RUN, don't walk, to your nearest bookstore. This amazing book by Rory Freedman and Kim Barnouin will truly open your eyes to how disgusting the food is that we eat. It's laugh-out-loud funny and some parts are so disgusting that you may consider never eating meat again! Ever since I read it, I am trying to make healthier food choices, hence the granola recipe. I took a nice trip to Whole Foods and rounded up the supplies for my granola. I actually got this recipe off of the Whole Foods website, where there are thousands of really great recipes. (www.wholefoodsmarket.com) Not only is this recipe delicious, it will make your whole house smell amazing! Toasting coconut, buttery macadamia nuts, creamy vanilla, what's not to love? And don't worry, eating healthy is about as "crunchy" as I will ever get. I am definitely not the "earthy" type, considering I never leave my house without makeup, wouldn't be caught dead wearing Patchouli, and am addicted to shopping! 


Coconut Macadamia Granola

Ingredients:
4 cups old-fashioned rolled oats 
1/3 cup whole-wheat pastry flour 
1/2 cup unsweetened coconut, finely shredded 
Pinch of salt 
2/3 cup pure maple syrup 
6 tablespoons canola oil or high oleic sunflower oil 
1/2 teaspoon vanilla extract 
1/4 teaspoon natural coconut extract 
3/4 cup chopped macadamia nuts
Directions:
1. Preheat oven to 300°F and oil a large rimmed baking sheet. Combine oats, flour, coconut and salt together in a large bowl. 
2. In a separate bowl, whisk together maple syrup, oil, vanilla and coconut extract to combine completely. Add to oat mixture, stirring well to coat. Transfer mixture to prepared baking sheet. Bake 30 minutes. 
3. Add macadamia nuts, turning and stirring the granola to mix them in. Continue to bake an additional 30 minutes.
4. Remove from oven and allow the granola to cool completely. Store in an airtight container in a cool dark place or in the refrigerator.


Alissa's notes: It's best if you stir the granola about every 10 minutes in the oven, so that it all toasts evenly. I omitted the coconut extract and added more vanilla extract instead. Also, I used regular shredded, sweetened coconut flakes from the baking aisle. Enjoy this granola with milk, on yogurt, or by itself. It's so yummy!

Sunday, December 12, 2010

Creamy Dreamy

As I was sitting in my house almost freezing to death, I decided to make some rice pudding to warm up. It is one of those "comfort foods" that I don't make very often, but absolutely love! I used Arborio rice, which is a rice named after the town of Arborio in the Po Valley of Italy, where it is grown. It is a short-grained rice, typically used to make risotto (which I'm not a big fan of). This rice has a higher starch content than white rice, which causes the pudding to have a creamier consistency. Yum! There are so many ways to make rice pudding. There are traditional recipes with cinnamon and raisins, and there are more unique recipes which include fruit such as peaches, oranges, or dried cranberries. This is one of my favorite recipes for a dairy-free rice pudding, but it can also be made with regular milk. I hope this recipe warms you up!


Creamy Rice Pudding

Ingredients:

3 cups cooked Arborio rice 
4 cups original Almond milk
1/2 cup Demerara cane sugar
1 tsp Madagascar vanilla bean paste (or 2 tsp vanilla extract)
pinch of grated orange peel
sprinkle of cinnamon and nutmeg (optional)

Directions:

1. Cook Arborio rice as directed on package to yield 3 cups. Place cooked rice in large saucepan. Add almond milk, vanilla, and sugar and cook over medium heat until the mixture starts to simmer (about 20 minutes). Allow mixture to simmer over low heat for 5 minutes.
2. Remove from heat and add grated orange peel, cinnamon, and nutmeg to taste. 
3. Serve warm or cold. Can be topped with orange segments if desired.


Alissa's notes: Most of the ingredients in this recipe can be substituted. You can use regular milk or regular sugar. I just wanted to make this version dairy free. If using regular milk, you may find it necessary to add a little more sugar. The pudding will not seem very thick at first, but thickens much more as it cools. 

Friday, November 26, 2010

My Favorite Fish Recipe

I am always saying that I need to include more fish in my diet. Every time I make it, I vow to make it more often, but never do. Now that I have found this delicious recipe, I will surely be making it more often. First of all, fish is one of the few food sources of omega-3 fatty acids (nuts are another good source) which we need in our diet since our body cannot produce them. These fatty acids are really beneficial for your heart, skin, fatigue, and even mood swings and depression. A lot of people don't eat fish because they can't get past that "fishy" taste. This recipe calls for tilapia, which is a very, mild white fish. It very rarely has a "fishy" taste, unless it's not fresh. Some other mild fish types that could be used in this recipe are cod, halibut, ahi-mahi, orange roughy, or flounder. Fish is also a great option for weeknight meals, since it cooks up in a flash. This recipe and photo were taken from The Steamy Kitchen website (www.steamykitchen.com).


Pecan Crusted Tilapia with Honey Glaze


Ingredients:

4 whole Tilapia fillets, cut in half lengthwise
3 T organic honey
1 cup Panko breadcrumbs
1/2 cup crushed pecans
salt & pepper
3 eggs, beaten
 
Honey Glaze: 3 T organic honey mixed with 2 T hot water
3 T olive oil, for frying

Directions:
1) Wash Tilapia and pat dry. Crack eggs onto a plate or breading tray. Combine breadcrumbs, salt, pepper, and crushed pecans in a separate breading tray or plate.
2) Using tongs or a fork, coat fish in egg and then press into breading mixture until coated.
3) Heat a large fry pan over medium heat. Add olive oil. When the oil is hot, turn the heat down to low. Add the fillets to the pan, make sure the fillets don’t touch each other. You may have to do this in separate batches. Fry on low for 2 minutes until the underside is golden brown. Turn. Fry another 2 minutes or until the fish is cooked through. While fish is cooking, whisk together honey and hot water to make the glaze. Pour the honey glaze over the fish. Note: if you don’t fry on low heat, the panko/pecan coating will burn before the fish is cooked through.

Alissa's notes: I used my Pampered Chef food chopper to chop the pecans very fine. If the pecan pieces are too large, they will fall off the fish while cooking. Also, breading trays make coating food so much easier. You can find them at Williams-Sonoma, and Pampered Chef makes them as well. This fish is great served with a salad (I did a caesar salad)!